Hie guys! Here's my DT post for Angie's Digital Stamps. The image that I've used here is called 'Butterfly On A Toadstool' and our theme this month is 'Anything Goes with Optional Twist: Monochromatic Green'.
I've created a boxed card for this one i.e. I've placed my beautiful green digi stamp in a 3d box. I'm quite enjoying this idea that I came up with which involves creating a 3d box on a card :D!
Hope you like what I created and thanks for dropping by :). I really appreciate your comments and feedback, and even though I may not be able to reply to every comment, I do read them all.
I've created a mixed media, shaker tag using the digi stamp 'After Party' which can be found here.
Since it's a fun stamp, I wanted to try something different. First of all, I coloured the digi stamp using my Spectrum Aqua markers (I just love these!). I then created a tag, stuck a contrasting colour pattern paper and started assembling the shaker elements. I covered the corners with crackle paste and highlighted everything with gold, green, blue and pink colours. I added some glitter here and there to tie up the whole tag. I simply love how the cracks show (some very fine and some deep and big ones).
If you liked my tag, please leave some feedback and encourage me to do better :). More such yumm posts coming up soon.
Finally getting a chance to enter for Lulupu's challenges. So here is my first ever entry :).
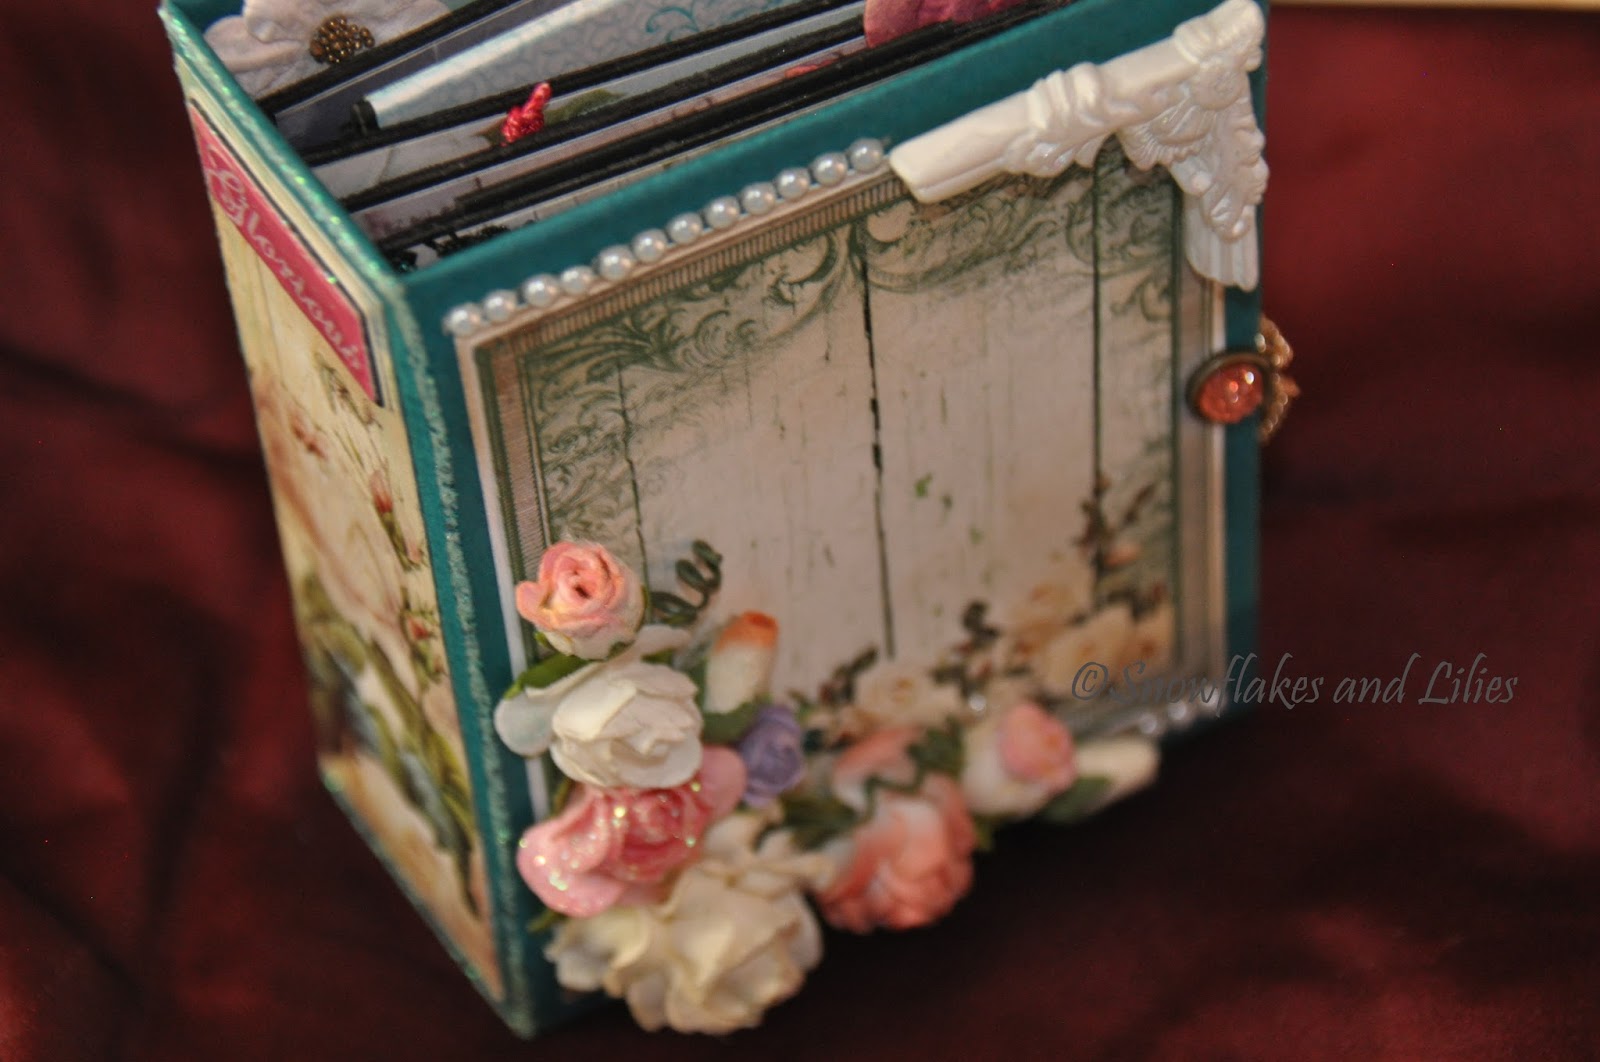
My 'Glorious' themed mini album is 4x3 inches in size (pretty miniature, I know! I love creating miniatures!). It hosts 5 pages, with flaps or fussy cut pockets or tags or with certain surprise features (that you can get to see in the video at the end of this post).
(Pictures best viewed in Full Screen.)
The cover is heavily decorated in a very ornate and dreamy way. Loads of flowers and paraphernalia, accentuated by pearl trims, shiny/textured Prima brad to balance the design and colours.
I've used papers that are heavy on the design aspect and contrasted that with subtle embellishments. For the spine, I glossy accented the word 'Glorious' and to give it a raised effect, stuck it on multiple cardstocks and design papers. To highlight the spine's exclusivity, I used glitter glue on all 4 sides.
For the back, I've used different strips of pattern papers and tried to elevate the back in a subtle way, instead of giving it a plain Jane look.
For the closure, I've used a metal chain, secured it with Prima brad, and added some kewtness with an Eiffel Tower charm.
Because the album is of a really small size, and because the cover is so heavily embellished for its size, I have used intricately designed papers (that provide style on their own) and contrasted them with a tad simplicity w.r.t. embellishing them. I've added a magnetised foldable tab that gives you 4 sides to stick pictures. All the pages have contrasting pearls/rhinestones at the corners. Some have lace or flowers or other embellishments. There's a lot of stamping on some of the pages and flaps.
Here you can see fussy cut flowers that have been made into a pocket for keeping tags and pictures.
For a quick run-through of my album, you can watch the video below.
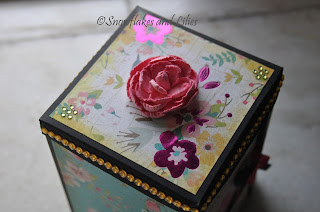
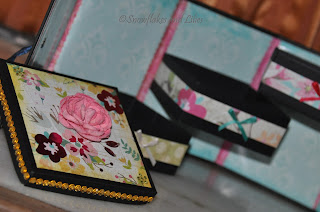
So my new project is inspired by Dr. Sonia's Quilled Box. I wanted to try this style out since some time now and found the perfect opportunity to do so.
I browsed through the tutorial and tweaked it according to my style. I used chipboard instead of cardboard, used pattern papers and wrapping papers, tried to add drama with distress inks and thought of making a different type of closure for the box.
(Pics best viewed in full screen.)
My final box sees some stamping, some glitter drama, distress inked edges and contrast combinations of pattern papers.
Some of the sides have been inked using Distress Ink - Old paper.
While the lid's been inked with Distress Ink - Mustard Seed.
Because the paper pattern is so beautiful on its own, I kept my embellishments/decorations to the minimal for the sides of the box. I only added a handmade flower and leaf, with a heart stamped and glittered.
For the back side of the box I used a bold and simple idea of adding a photo mat with a kewt 'Love' stamp. For the photo mat and the inside paper, I've distressed it with Distress Ink - Peacock Feathers.
Because the outside of the box has so much going on, I decided to keep the insides simple and to a minimal to contrast with the outside drama. I used a neat blue wrapping paper, and contrasted it with pink borders in-between. I kept the boxes to a bare minimum and continued the theme by using all the papers on the small boxes that I used for the outside box. And finally, I added a kewt bow.
It was so much fun creating this project and I'm happy I was able to complete it before abandoning it lol.
So my latest project is for Valentine's Day. Bold colours, bold flowers, bold theme. It's a multi-way wall hanging that I designed but later on I thought that it could be used as a table decor as well, and that is so kewl. Multiple ways of displaying one decor.
So my base is mdf sheets and I decoupaged it, yet again, lol, to provide some texture. I coloured it, stamped on it, embellished it with flowers, chipboard pieces, letters, frames and what not. I made a pocket tag for the top black hanging, to write a message or stick a kewt lil photo. Hope you guys like it.
I really love the way this one looks on a table.
My products can be purchased from my Facebook page 'Snowflakes and Lilies'.
You can also contact me on my email id: snowflakesandlilies@gmail.com
My new project is another of my favourites - the sweetheart bottle!
I've added a crackled texture for the base, with golden highlights. Every bit of leaf and letter and golden pebbles that you see is handmade and hand painted. I added the gold chains for a really royal effect.